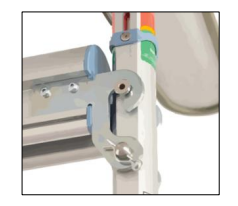
This section will guide you on how to assemble and adjust the gantry. Prior to assembly, remove the components from the packaging, inspect the condition of each component and ensure that all components are available. See the list below for the full component checklist. If any component is damaged, do not assemble the gantry and contact the local authorized dealer for replacement parts.


Follow the guidelines below for the correct assembly method. A two-person assembly is recommended.
1. Place the circular bottom plates on the floor in the expected position of use

2. Insert the bottom of the support post into the bottom plate.

3. Insert the top plate onto the top of the support post.

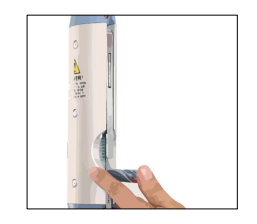
4. Depress the red latch and release the safety lock.

5. Depress the ratchet button to release the lever, then push the lever up until it meets the magnet symbol. Note: pushing down on the top part of the support post may help to release the lever.

6. Push the top part of the support post upwards until the top plate compresses against the ceiling. Push until you hear two clicks on the ratchet.

7. Open the post level (opposite the safety lock) and check that the bubble is within the central circle by adjusting the position of the support post.
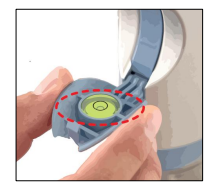
8. Pull the lever down until it is flat to the support leg and click into place.
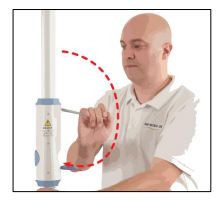
9. Check to ensure that the blue marker on the pressure gauge (located at the top of the support post) is comfortably in the green ‘safe’ zone on both sides. If it is not, it will be necessary to release the lever again and apply more than two clicks before closing it.
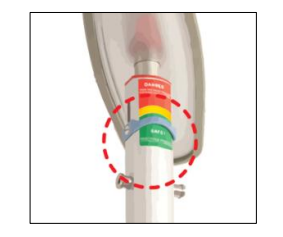
10. Push the safety lock back into place until it clicks and rotate the post to ensure that the lever is facing 90 degrees to the position of the second post.
11. Repeat the procedure to build the second support post and set it perpendicular to the first. Ensuring the second post is within 2.8m of the first installed post.
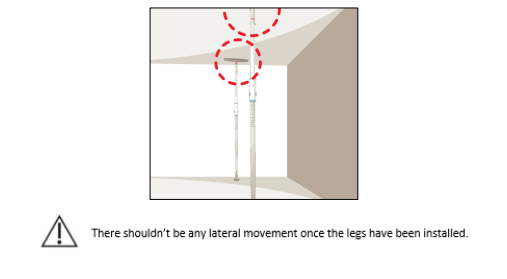
12. Lift the track (you may need assistance from another person and steps to reach) and hook one end onto the support post pins.
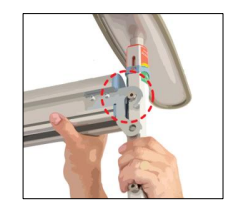
13. Extend or contract the track to fit between the two support posts and hook it onto the support post pins at the other side.
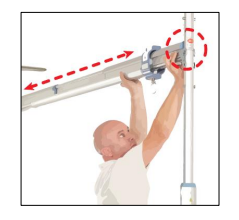
14. On either post, fit the safety pins by pushing them through the post and track as shown.
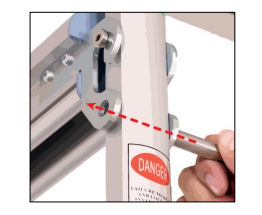
15. Install the retaining clip through the end of the safety pin to secure it in place.
