Installing the Ceiling Hoist
Each variant of ceiling hoist is installed into the track in the same manner but see below for detailed instructions which may vary slightly for different ceiling hoist types. Each varying track type of ceiling hoist is installed into its relevant track type following the same method.
To install the ceiling hoist correctly, follow the guidelines below:
5 . 1 Standard ceiling hoist install
1. Remove the safety components found in the track system for access. (Refer to section 4)
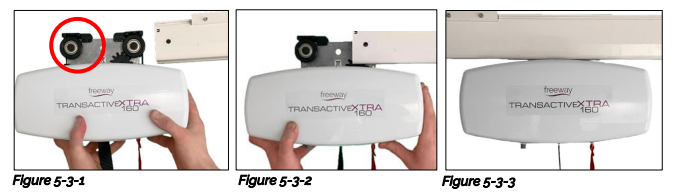
2. Using both hands to support the ceiling hoist, raise the ceiling hoist up to the ceiling track entrance (See figure 5.1.1)
3. Ensure that the charging beak is orientated to align with the charging dock. (Ceiling hoist orientation is dependent on which end the charging dock is situated). (See figure 5.1.1)
4. Place the ceiling hoist wheels into the track profile, be careful not to damage the charging beak and its cable. (5.1.2)
5. Slide the ceiling hoist to the centre of the track system. (5.1.3)
6. Close the track system by fitting the safety components at either end. (Refer to section 4)
7. Where applicable, install the charging dock to the system. (Refer to section 6)

5 . 2 Powered Auxiliary ceiling hoist install (Turntables only)
Follow the guidelines above, noting the following points:
1. The powered auxiliary ceiling hoist for turntables will have two beaks on the chassis trolley. Ensure that the charging beak is orientated to dock with the charger. (See figure 5.3.1)
5 . 3 QRT system install
Preparing the track for QRT ceiling hoist
1. Determine a suitable location, next to where the charging dock will be installed for a trolley dismount point.
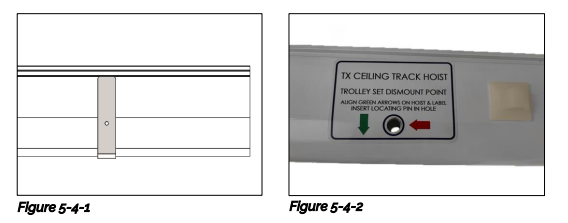
2. Using the template, drill a 9mm hole through the track extrusion. (See figure 5.4.1)
3. Place the trolley dismount sticker onto the track with the dismount point aligning with the drilled hole. (See figure 5.4.2)
4. Place an adhesive clip next to the dismount point. When the charging dock in installed, the dismount pin can be secured onto the clip. (See figure 5.4.2)
Installing the trolley
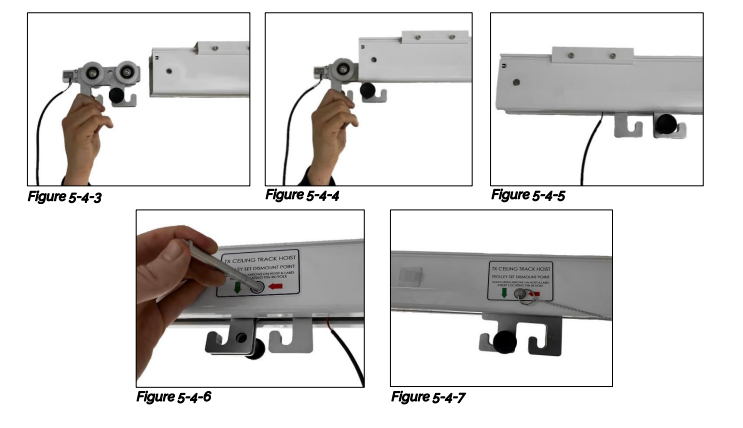
1. The QRT can be installed (without ceiling hoist attached) in the same fashion as a standard ceiling hoist install. Refer to section 5.1). Ensure that the charging beak is orientated to dock with the charger.
2. Position the QRT under the trolley dismount point and place the dismount pin through the track to secure the trolley in place.
Installing the ceiling hoist onto the trolley
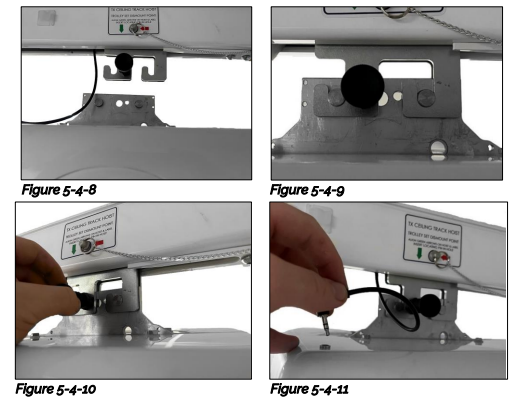
1. Disengage the plunger found on the side face of the trolley to allow attachment access. (See figure 5.4.8)
2. Using both hands to support the ceiling hoist, raise the ceiling hoist up to the trolley and align the ceiling hoist anchors with the trolley hooks. (See figure 5.4.9)
3. Engage the plunger to secure the ceiling hoist into the trolley. (See figure 5.4.10)
4. Plug the charging beak jack lead into the port found on the top of the hoist covers. (See figure 5.4.11)
5. Use a cable tie to route the lead to the ceiling hoist chassis.
6. Remove the dismount pin to release the trolley and place the pin back onto the adhesive clip.
Removing the ceiling hoist from the trolley
Removal is a reversal of the install process noting the following points:
1. Traverse the ceiling hoist to the dismount point and align the dismount hole in the track with the hole found on the trolley centre.
2. Insert the dismount pin through the track to secure the trolley in position.
3. Disconnect the charging beak jack lead and snip the cable tie securing the lead to the chassis.
4. From here you can now disengage the trolley plunger and raise the ceiling hoist out of the trolley to remove.