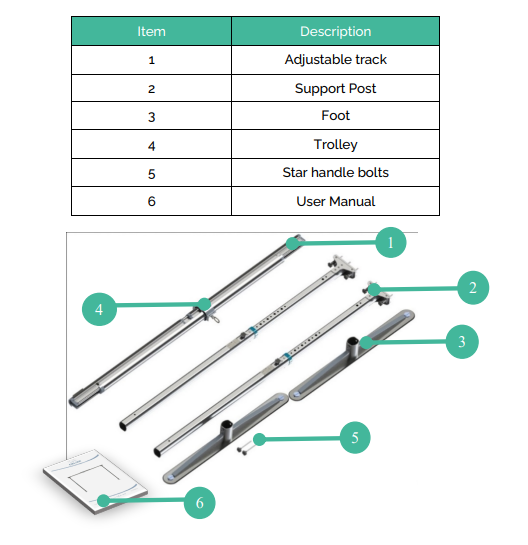
This section will guide you on how to assemble and adjust the gantry. Prior to assembly, remove the components from the packaging, inspect the condition of each components and ensure that all components are available. See the list below for full component checklist. If any component is damaged, do not assemble the gantry and contact the local authorised dealer for replacement parts.
Follow the guidelines below for correct assembly method, a two person assembly is recommended.
1. Determine where the product is going to be installed, and clear the area from any obstacles.
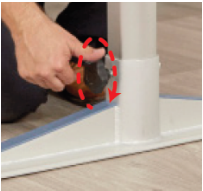
2. Place a single foot onto a level surface and remove the star handle from its fixing
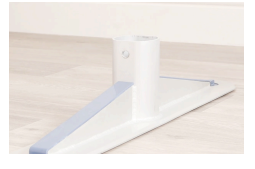
3. Insert the bottom of the support post into the foot as shown. Ensure to use both hands to support the post while inserting.
4. Insert the star handle through the foot and post assembly and secure tightly.
5. Repeat steps 2 – 4 for the other foot and post assembly, and position them approximately 2.5m apart.
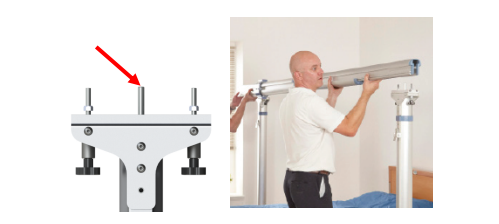
6. Place the track onto the support posts using the locating pin on the posts to align the track correctly.
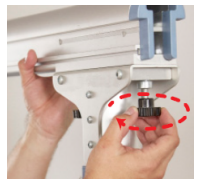
7. Secure the track to the support posts by tightening the star handles as shown. This should remove lateral movement.
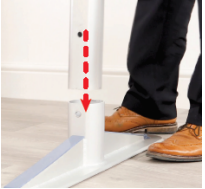
8. To adjust the height of the gantry, first remove the safety and lynch pins found on both support posts.
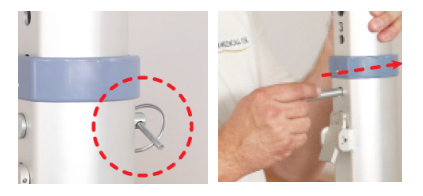
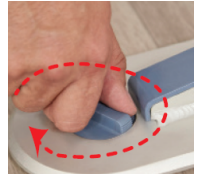
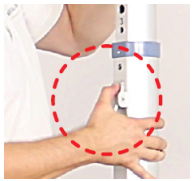
9. Press the latch found on the support post and raise the track vertically until the desired height has been reached. (This must be done on both posts)
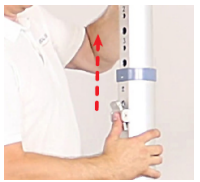
10. Once the desired height has been reached, release the latch and ensure it locates into the nearest hole found on the moving post. (Ensure this is done on both support posts and that the posts are set to the same height).
11. Re-insert the safety and lynch pins into both support posts.
12. If required, adjust the self-leveling screws to improve stability