Track systems which require constant charge will require the strips to be fitted to the track prior to installing the track onto the ceiling. There are two options of constant charge strips, with the tape being the simpler method of install. See below on fitting instructions.
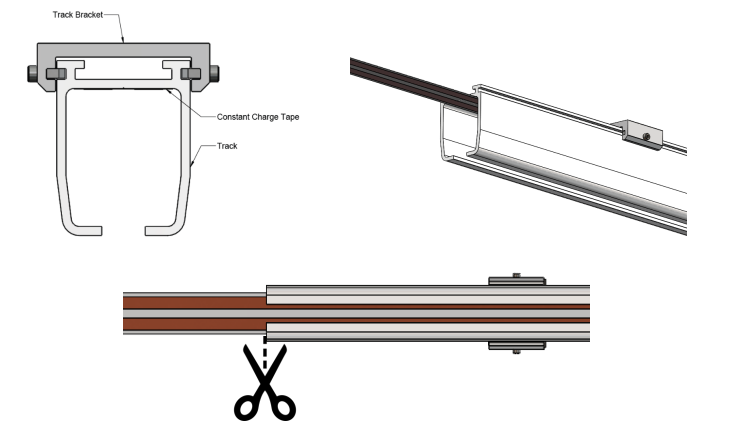
10.2.1 Constant charge systems – Tape Style
1. To attach the constant charge strip to the roof of the track, you will need remove the backing off the tape to expose the adhesive strip.
2. Once the constant charge tape is ready, position it flush at one end of the track centrally and press down to adhere it to the track.
3. Pull the tape through the track until you reach the total length of the track.
4. Pull it taut (ensuring it is still located in the centrally) and adhere it to the total length of the track.
10.2.2 Constant charge systems – Insert Style
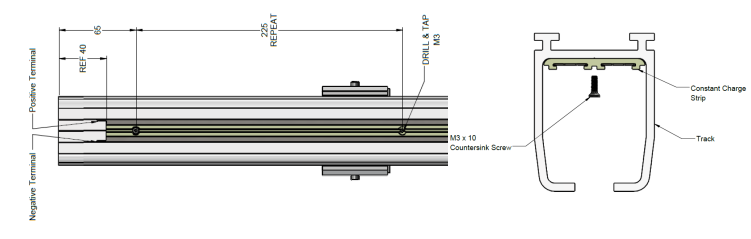
Single Track
1. To attach the constant charge strip to the roof of the single track, you will need to drill, tap and counter sink M3 holes every 8.86” (225mm) along the centre of the plastic strip and track.
2. Cut the strip to the length of the track system and secure in place with a M3 x 10 counter sink screws.
3. Place a positive and negative sticker on either side of the track to determine a positive and negative terminal for the charge strips.
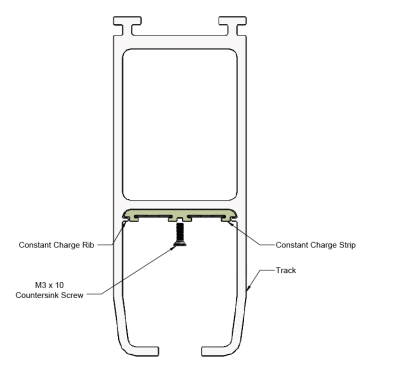
Mid-Duty and Heavy-Duty Track
1. To attach the constant charge strip to the mid-duty and heavy-duty track, slide the constant charge strip between the roof of the track and the constant charge ribs.
2. Cut the strip to the length of the track system and fix it in position with a M3 x 10 countersink screw at either end of the track.
3. Place a positive and negative sticker on either side of the track to determine a positive and negative terminal for the charge strips.